You are here: Wiki>Metadata Web>SmartEditor>SmartEditorUserGuide (25 Feb 2015, danielnuest)Edit Attach
smartEditor User Guide
Introduction
Smart Editor is a web editor integrating both the INSPIRE metadata publication queryables for services, series, and data and the ISO 9139 metadata implementation of ISO 19115 and ISO 19119 as well. This document describes the general usage of smartEditor and shows some important metadata elements to be edited. It assumes you followed the installation instructions.Starting smartEditor
After typing http://[host]/smartEditor into your browser the application welcomes you with the main start page.Create New Document
Use the New Document function to open a new metadata document. It is possible to create metadata entries for datasets, series, and services. Select a resource type and start editing with a new document. The available metadata elements in the editor are depending on the choice of resource.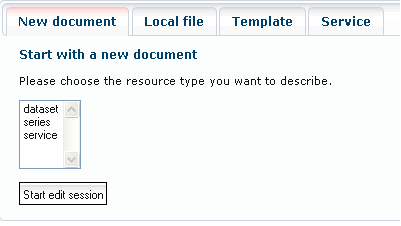
Edit local file
It is possible to open a previously created metadata document with the Smart Editor and to continue editing it. Select the locally available XML file and start the editor. If necessary you can use a stylesheet from the list to transform the metadata into INSPIRE compliant metadata.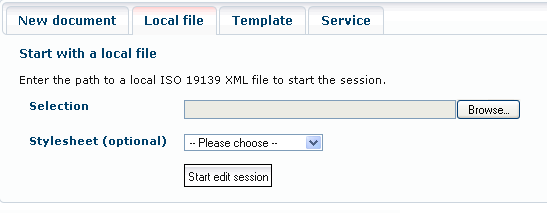 If the XML-file is a compliant metadata document, no stylesheet is required.
Use a template to create a document
It is possible to create and save metadata templates for use with the Smart Editor. All templates that are available for use will be displayed in a list.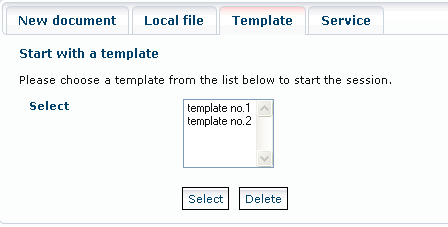 Select a template from the list to open the editor, or highlight a template and delete it.
Note: New templates are created in the editor environment. Run Smart Editor and enter all the parameters for your template. Then select “Create Template”. The title of the metadata is used as the name of the template.
Tip: Templates have the advantage that input values can be pre-defined, which means that you can suggest values, such as contact data. This minimises the work involved in collecting metadata.
Create Service Metadata (Capabilities Query)
Using Smart Editor, it is a simple matter to record service metadata of INSPIRE services. Enter the URL of the service and start Smart Editor.
Editing Metadata
After Smart Editor has been opened, it is possible to begin entering the metadata into the user screen. The metadata elements have a similar structure to the detailed metadata view.
Basic application functions
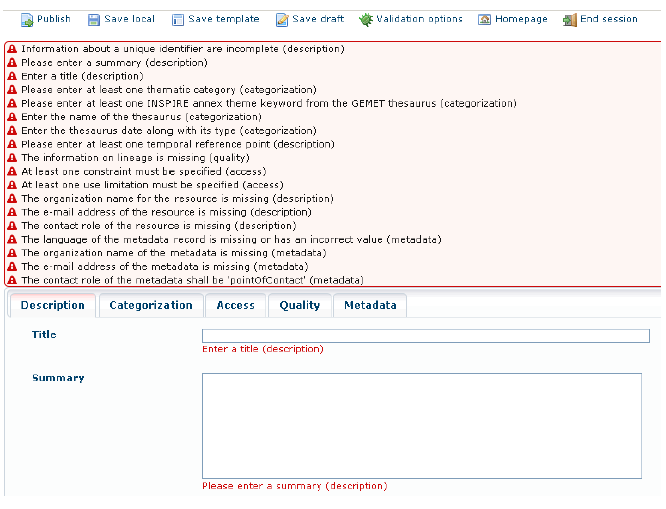
In addition, seven basic functions are made available above the tabulators.Publish metadata
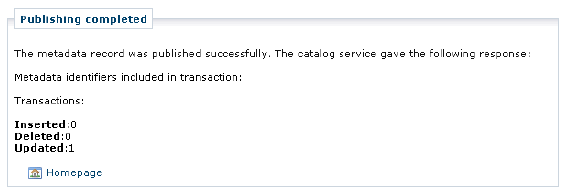
 After clicking on “Publish it” smartEditor sends the metadata via an CSW transactional Request to the configured CSW endpoint. Then smartEditor gives you notice about the response of the CSW request:
Save metadata locally in XML format
Save template
Save draft
Choose a validator
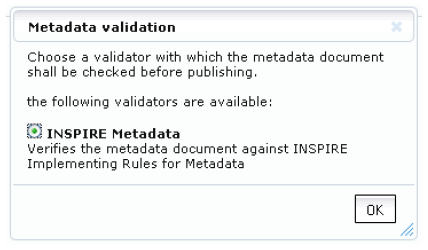 Important note: For validation click on Publish to query the current validation state of the metadata entries. The validation reports are displayed above the tabbed display.
Homepage
Stop the current editing session
Editor should be closed. Note: When closing the editor or ending an editing session, a message is displayed saying that all
changes will be lost if you close the editor.
Tooltips
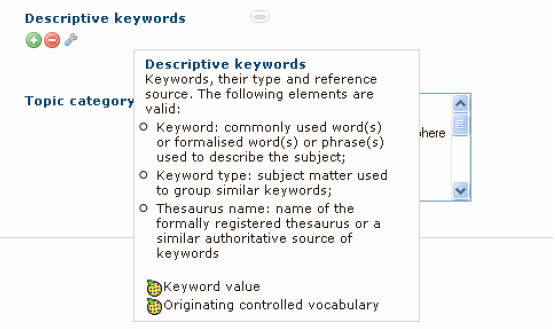
Do you require an explanation for a metadata element? Then hold down the Alt key and move themouse cursor to the name of the element. An explanation is then displayed. This tooltip consists of a
description and the ISO element name.
Editing
Initially, a few metadata elements may be either filled or empty, as determined by the administrator.Accordingly, input interfaces have already been generated for some metadata elements. The
following three buttons are used for adding, deleting or editing input interfaces:
Description
 Record the metadata elements used in the description of the geo-resource. You can display tooltips for any metadata element. Hold down the Alt key and move the mouse cursor onto the element name.
Categorization
 Record the metadata elements used for the thematic or hierarchical categorisation of the geo-resource.
Access
 Record the information for accessing the resource.
Quality
 Record quality information for the resource and INSPIRE conformity information.
Metadata
 Record the descriptive information for this metadata entry.
Recording Service Metadata
Note that the user screens for recording service metadata have fewer parameters. However they also have a number of additional metadata elements. The metadata elements in the thematic and hierarchical categorisation of the service do not have a thematic category. But they additionally display the following elements: Select the service type for the resource from the list. Note: Services have different operations defined. The standard one is the operation of requesting the service capabilities. For some service types the operation is given above.

Tips for describing services
Linking to a service with datasets: To link a dataset to a service, an element must be generated for each dataset under ‘Access > Coupled resource’. Enter an operation name (as in the Service Operations illustration) plus the name of the Layer or FeatureType (if available). The identifier is defined using a dialog for a separate search. Click on the Tool icon to search for a dataset. If an identifier has been created as defined previously for dataset descriptions, the latter can be linked to here. The ‘Show coupled service’ icon is displayed in the hit list.
Versions
A list of versions of this wiki page matching the respective versions of smartEditor:- 2.1.6 > current, corresponding with PDF user guide version 1.1 as of 07.02.2011: 52n_smarteditor_2.1.6_user_guide.pdf
Edit | Attach | Print version | History: r5 < r4 < r3 < r2 | Backlinks | View wiki text | Edit wiki text | More topic actions
Topic revision: r4 - 25 Feb 2015, danielnuest
Legal Notice | Privacy Statement
 Copyright © by the contributing authors. All material on this collaboration platform is the property of the contributing authors.
Ideas, requests, problems regarding Wiki? Send feedback
 Copyright © by the contributing authors. All material on this collaboration platform is the property of the contributing authors.
 Ideas, requests, problems regarding Wiki? Send feedback


