You are here: Wiki>Geoprocessing Web>GeoprocessingTutorials>TutorialWpsEclipseIndigo (25 Aug 2014, danielnuest)Edit Attach
A Primer on the 52°North WPS in Eclipse Java EE Indigo
By Matthias Müller, 2009-03-19
1. Prerequisites
If one of the prerequisites is missing, the necessary steps are described below. You need:- Maven2 installed
- Apache Tomcat installed
- Eclipse IDE Indigo for Java Developers. Please note: This tutorial is explicitly for this Eclipse version and won't work with other versions the same way (including the JEE version of Indigo).
- Eclipse.ini with jdk (e.g.
-vm /opt/sun-jdk-1.6.0.02/bin/java) configured
2. Download Eclipse Java Indigo
Go to http://www.eclipse.org and download Eclipse IDE Indigo for Java Developers. Note: It is highly recommended to edit the eclipse.ini file located in your eclipse folder. Please add* -vm \\bin\javaw.exe such as * -vm C:\Programs\Java\jdk1.6.0_16\bin\javaw.exe for Windows or the following for Linux:
* -showsplash
org.eclipse.platform
--launcher.XXMaxPermSize
256m
-vm
/opt/sun-jdk-1.6.0.02/bin/java
-vmargs
-Xms40m
-Xmx512m
Note: Make sure you add the parameter -vm before the -vmargs parameter as in the example above. The -vm option and its value (the path) must be on separate lines. For more information check out the Eclipsepedia. Also note that there is no javaw.exe in Linux; just use java instead. This allows eclipse to use a JDK, since there are some know issues for eclipse in not recognizing correctly a set JDK, which is required for this tutorial.
3. Install Maven2
Download a maven version >=2.2.1 from http://maven.apache.org/download.html. Note: Maven 2.2.1 was used for this tutorial. Unzip maven-2.X.X-bin.zip to the directory you wish to install Maven 2.X.X. These instructions assume you choseC:\Program Files\Apache Software Foundation\maven-2.2.1
Add the bin directory to your path, by opening up the system properties (WinKey + Pause), selecting the "Advanced" tab, and the "Environment Variables" button, then editing the PATH variable in the user variables. eg. "C:\Program Files\Apache Software Foundation\maven-2.2.1\bin";%PATH%
In the same dialog, check if the JAVA_HOME environment variable does not exist, if not, create it.
Make sure that JAVA_HOME is set to the location of your JDK, e.g. C:\Program Files\Java\jdk1.5.0_02.
Open the command line and: - Run
mvn --versionto verify that it is correctly installed. - Run
mvnto generate the local repository. (You will see some errors, but don`t mind.)
C:\Documents and Settings\\.m2
Install Subclipse
Eclipse -> Help -> Eclipse Marketplace -> Search for "subclipse"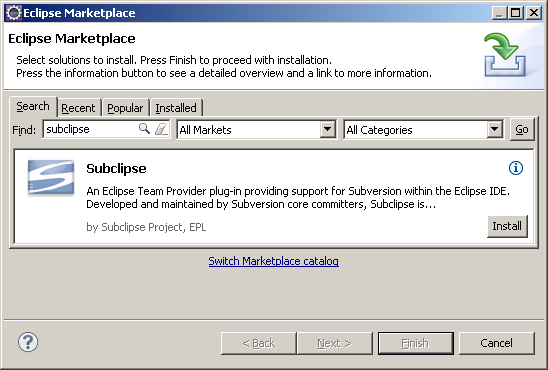 Hit "Install"
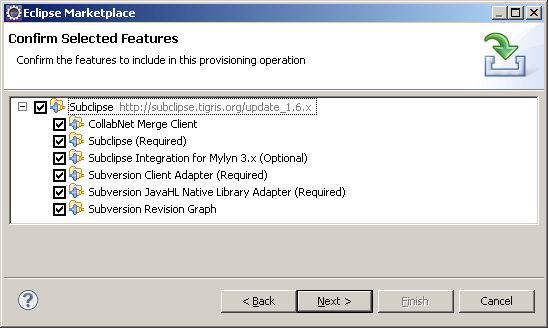 Hit "Next", accept the terms and conditions of the license agreement, hit "Finish".
5. Install m2e-subclipse
Eclipse -> Window -> Preferences -> Maven -> Discovery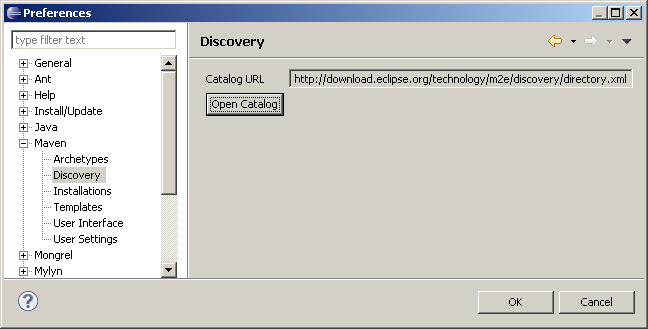 Click "Open Catalog" and search for "m2e-subclipse"
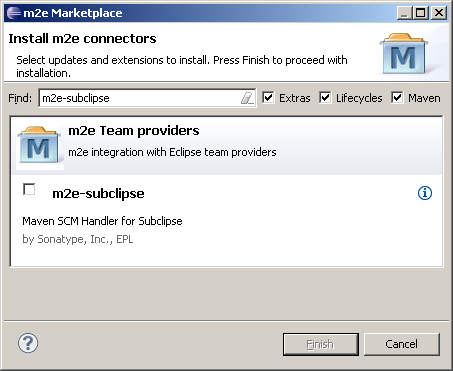 Select the checkbox and hit "Finish". Accept the terms and conditions of the license agreement, hit "Finish". You also can install the m2e-subclipse plugin later, see section 7.
6. Install Mongrel
For direct Apache tomcat support, you need the extension Mongrel: Eclipse -> Help -> Eclipse Marketplace -> Search for "mongrel"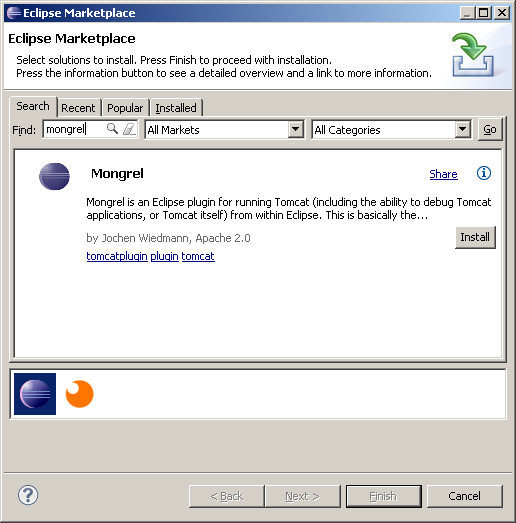 Hit "Install", accept the terms and conditions of the license agreement, and hit "Finish".
7. Checkout the WPS source code
Eclipse -> File -> Import -> Maven -> Check out Maven Projects from SCM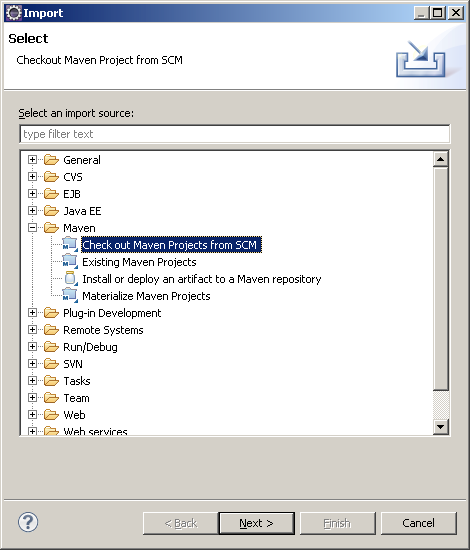 The required SCM URL is two parts:
 SVN | https://svn.52north.org/svn/geoprocessing/main/WPS/trunk/WPS/
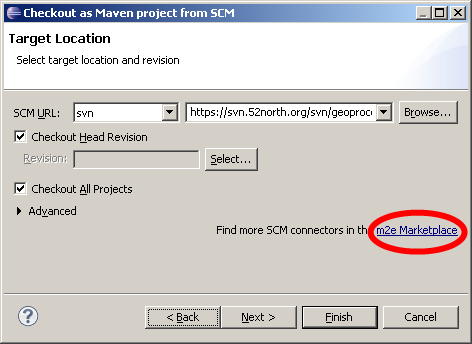 Then hit "Next".
Note: If the SCM type dropbox is empty click on "m2e Marketplace" and follow the steps of section 5.
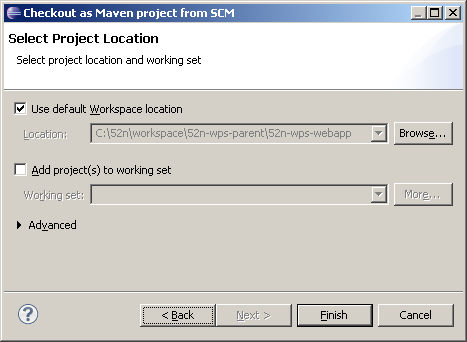 And "Finish".
Your project should now look like this:

8. Compilation
In order to compile the downloaded code, right click on the module 52n-wps-webapp --> Run As --> Maven install OR Open the command line, navigate to the directory where the 52n-wps-parent directory is located and typemvn install
You should see a BUILD SUCCESS message afterwards.
9. Deploy your WPS as Web Application
Eclipse -> Window -> Preferences --> Mongrel Select your Apache Tomcat version and provide the path to your Apache Tomcat installation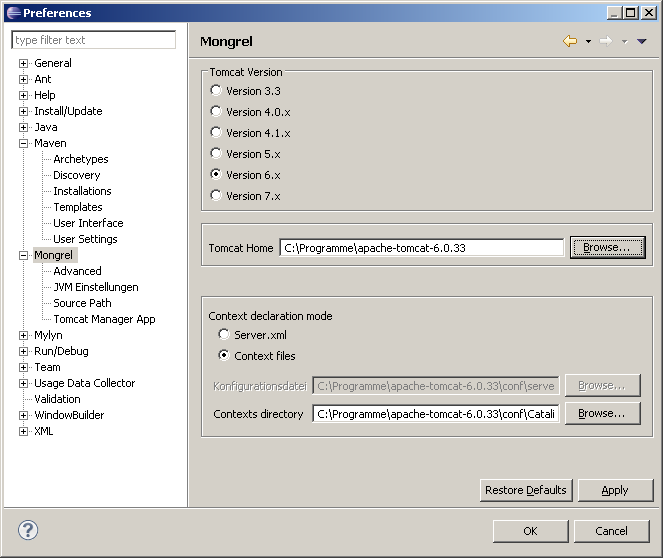 Hit "OK" to finish the dialog.
In order register the WPS in Apache Tomcat, you need to:
 - In your file system, go to your Apache Tomcat folder /conf/catalina/localhost
- Add an XML file named
wps.xmlwith the following content:
WPS>\52n-wps-webapp\target\52n-wps-webapp-X.X-SNAPSHOT" debug="1"/> WPS> 52n-wps-webapp-X.X-SNAPSHOT exists.
10. Starting/Debugging the WPS webapp
In Eclipse: Hit the yellow Tomcat Icon to start/debug your service. Capabilities can be retrieved by this request:http://localhost:8080/wps/WebProcessingService?Request=GetCapabilities&Service=WPS&Version=1.0.0
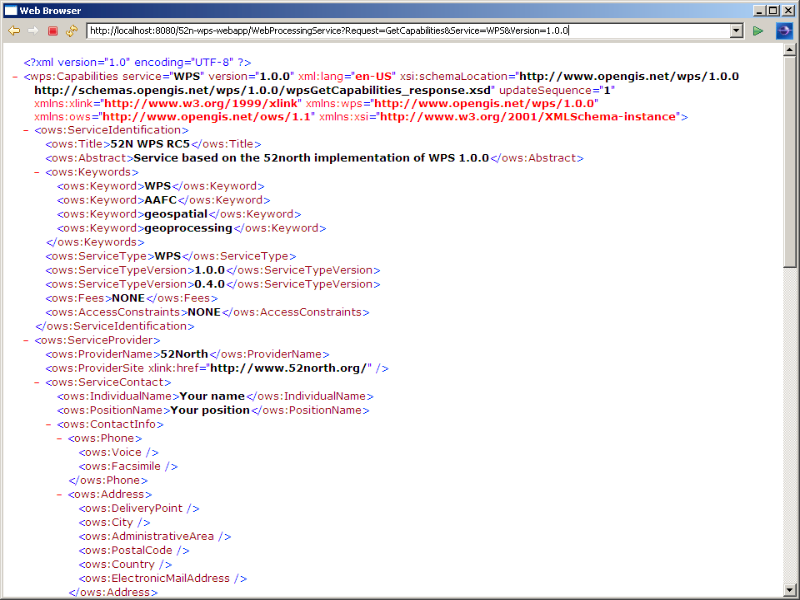 Enjoy debugging :-)
Metadata
- Topic created by: DanielNuest
- Topic created on: 2013-03-20</verbatim>
Edit | Attach | Print version | History: r4 < r3 < r2 < r1 | Backlinks | View wiki text | Edit wiki text | More topic actions
Topic revision: r3 - 25 Aug 2014, danielnuest
Legal Notice | Privacy Statement
 Copyright © by the contributing authors. All material on this collaboration platform is the property of the contributing authors.
Ideas, requests, problems regarding Wiki? Send feedback
 Copyright © by the contributing authors. All material on this collaboration platform is the property of the contributing authors.
 Ideas, requests, problems regarding Wiki? Send feedback


