You are here: Wiki>Geoprocessing Web>GeoprocessingTutorials>ExtendingTheWPS>DeployWPSProcesses>DeployProcessViaAdminConsole (28 Jan 2014, EikeJuerrens)Edit Attach
Deploy a custom process via the admin console
Open the Web Admin Console
In order to deploy the recently developed process, you need to:- Make sure your servlet container (e.g. Tomcat) is running.
- Open: http://localhost:8080/wps/ in your browser
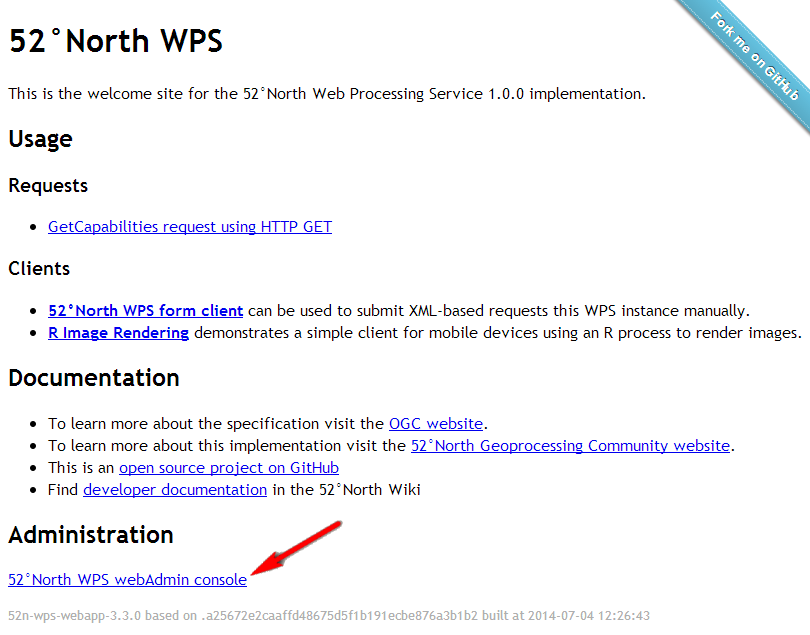
- Click on 52°North WPS Web Admin Console
- You could also directly access the Admin Console via: http://localhost:8080/wps/webAdmin/index.jsp
- Login with username wps and password wps
- The Web Admin Console lets you change the basic configuration of the WPS and upload processes.
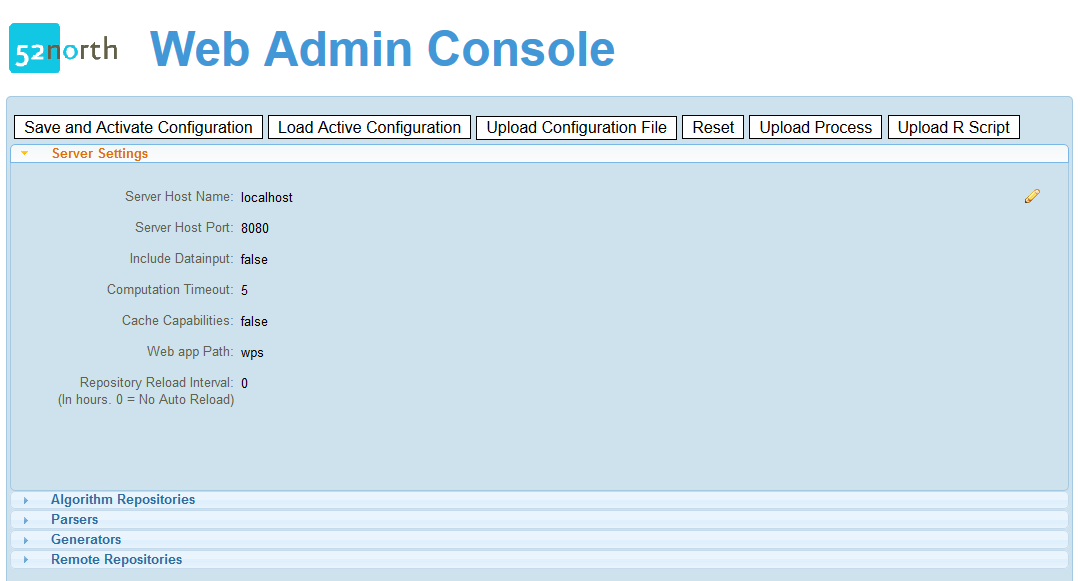
Upload the process files
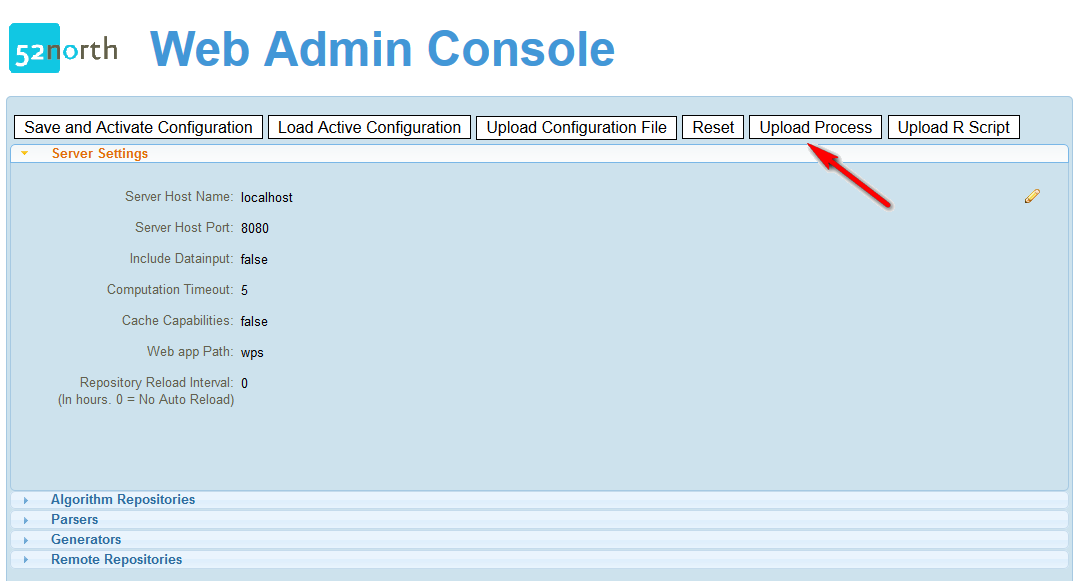
- Click on Upload Process as shown below
- Enter for the first text box the name of the class you developed, e.g.: org.n52.wps.demo.AbstractAlgorithmExample
- Choose your java class file with the filechooser
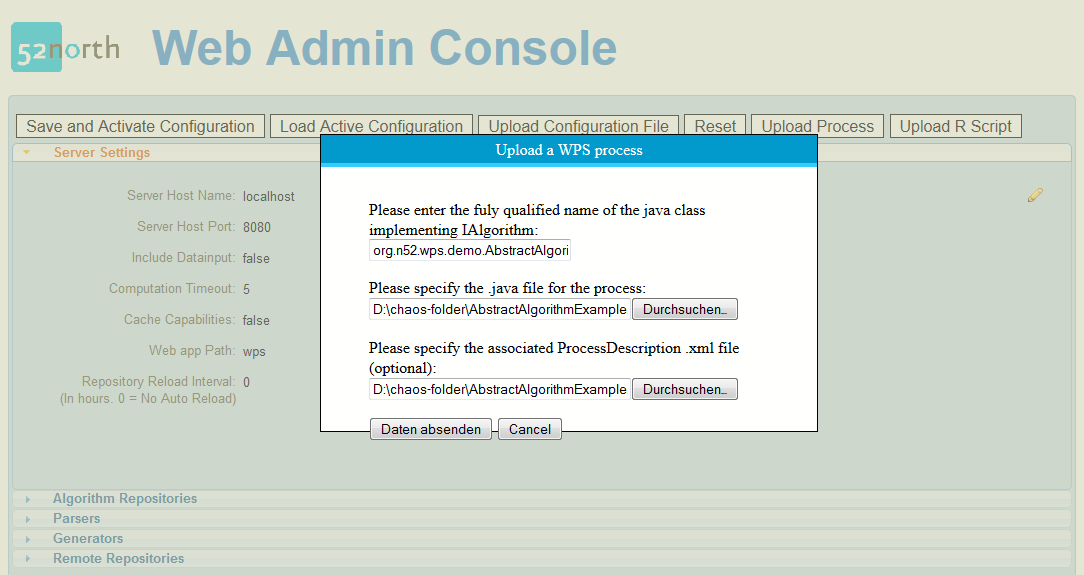
- If your process extends AbstractAlgorithm, you also will have to specify the path to the ProcessDescription file.
- Click on Send files.
- The source file gets now compiled at server side and will be available as a new process to the WPS. Note that you will need a Java SDK (6 or 7 ) for compiling the code.
Activate the process
In order to avtivate the process follow these steps:- Switch to the Algorithm Repositories tab:
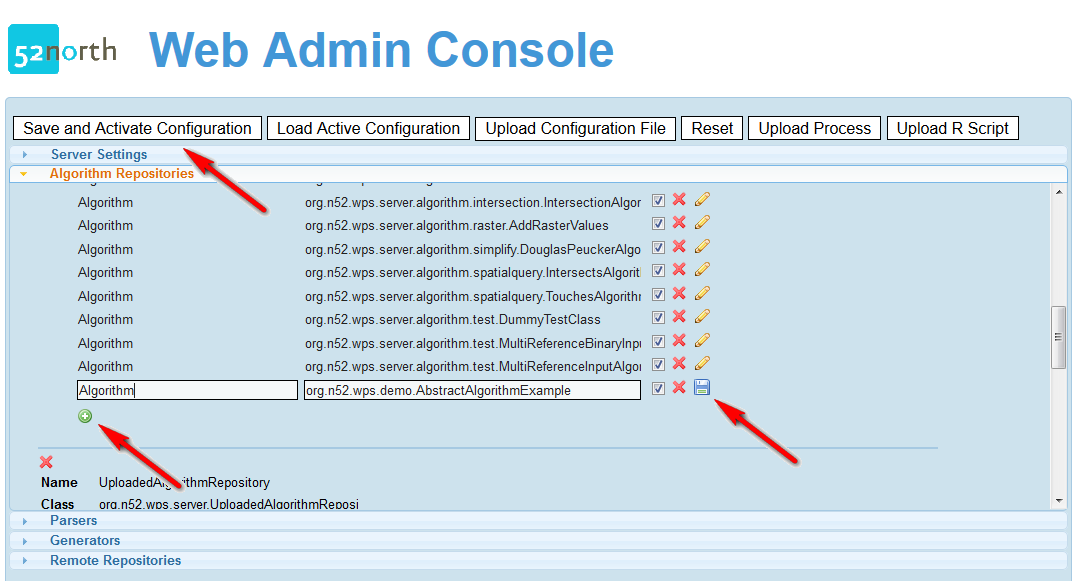
- Scroll to the LocalAlgorithmReporitory
- Click the plus sign after the last Algorithm of the repository.
- Add as key Algorithm and as value the fully qualified name of your process, e.g.; org.n52.wps.demo.AbstractAlgorithmExample
- Click the save button.
- Click Save and Activate Configuration
- Your process should appear in the capabilities.
- Execute your process.
| I | Attachment | Action | Size | Date | Who | Comment |
|---|---|---|---|---|---|---|
| |
activate1.png | manage | 59 K | 07 Jun 2013 - 13:51 | UnknownUser |
Edit | Attach | Print version | History: r9 < r8 < r7 < r6 | Backlinks | View wiki text | Edit wiki text | More topic actions
Topic revision: r8 - 28 Jan 2014, EikeJuerrens
Legal Notice | Privacy Statement
 Copyright © by the contributing authors. All material on this collaboration platform is the property of the contributing authors.
Ideas, requests, problems regarding Wiki? Send feedback
 Copyright © by the contributing authors. All material on this collaboration platform is the property of the contributing authors.
 Ideas, requests, problems regarding Wiki? Send feedback


