|
|
You are here: Wiki>Geoprocessing Web>WPS-ArcMap-Client>AllInOneGUI (06 May 2013, BenjaminPross)Edit Attach
AllInOneGUI
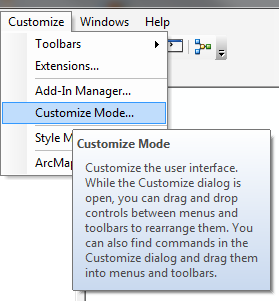 The customize dialog will appear. Switch to the Commands tab and navigate to the entry Java Comands. You should see a Command showing the 52°North logo and the text Start WebGen WPS ArcMap Client:
 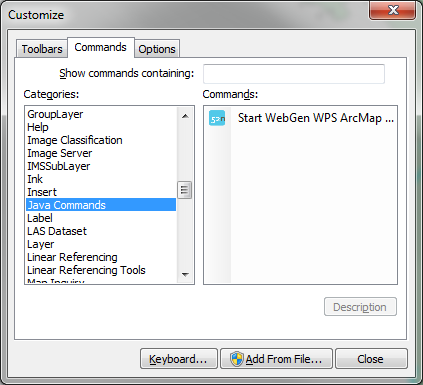 You can now simply drag the Command with the mouse to a toolbar:
 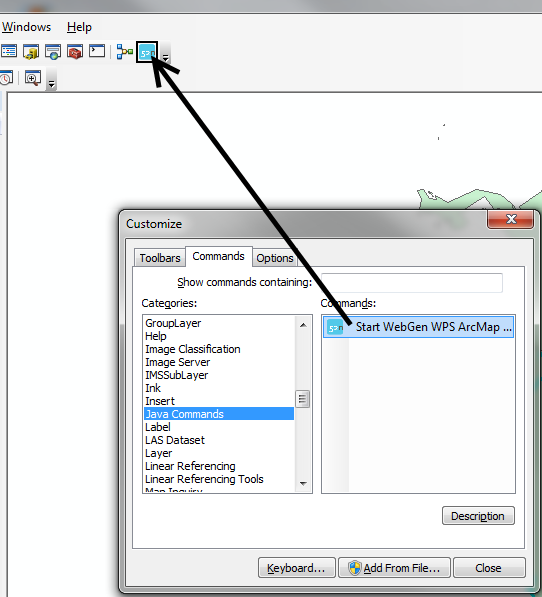 Close the customize dialog. A click on the command will bring up the client:
 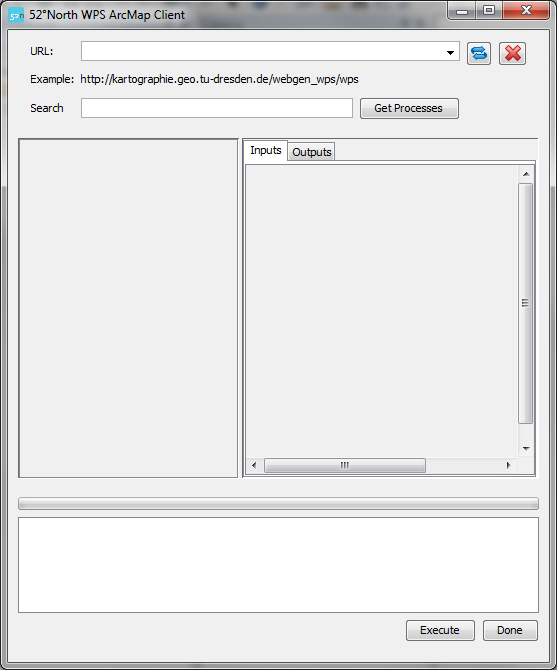 You can now type in an URL to a WPS. If you have typed in URLs before these will appear in the drop-down box:
 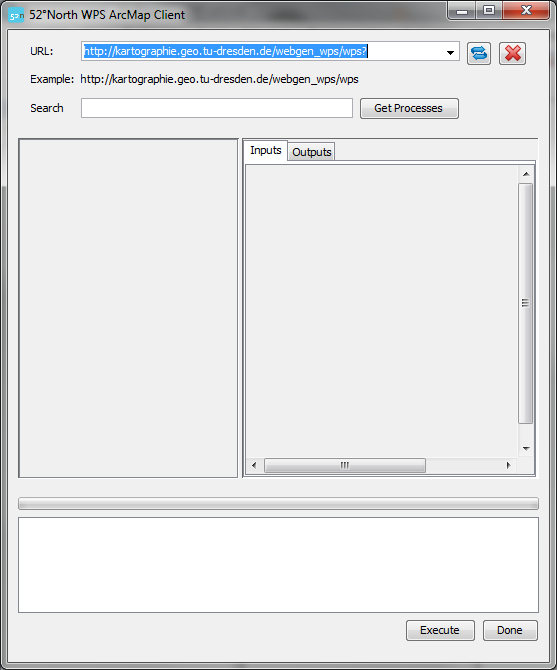 You can also remove
  You can also filter the list of processes. Simply type in characters the process must contain and click again on Get Processes:
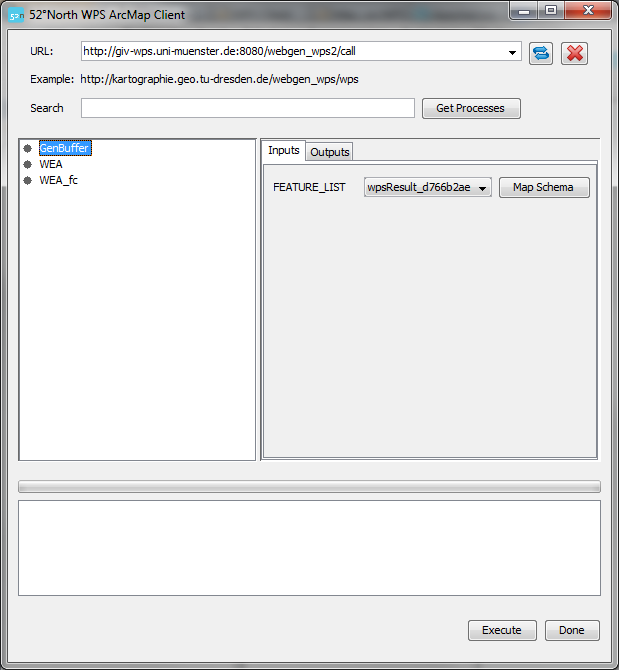
 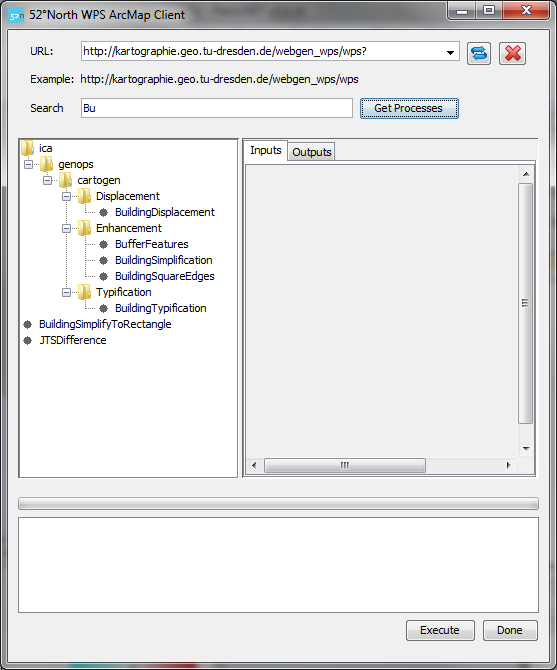 A click on one of the processes will show the inputs that are expected for this process:
 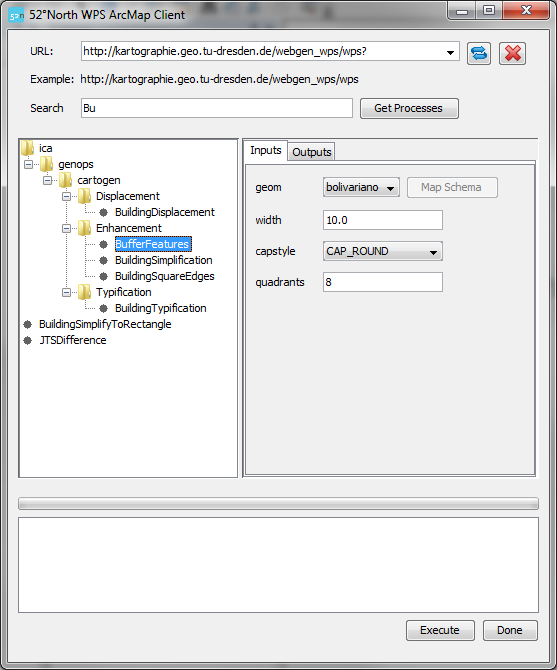 If a input should require vector data, a list of available layers is shown for this input. After you have adjusted the inputs to your needs a click on Execute will start the process. Log messages informing about the current status will be shown at the bottom of the client dialog:
 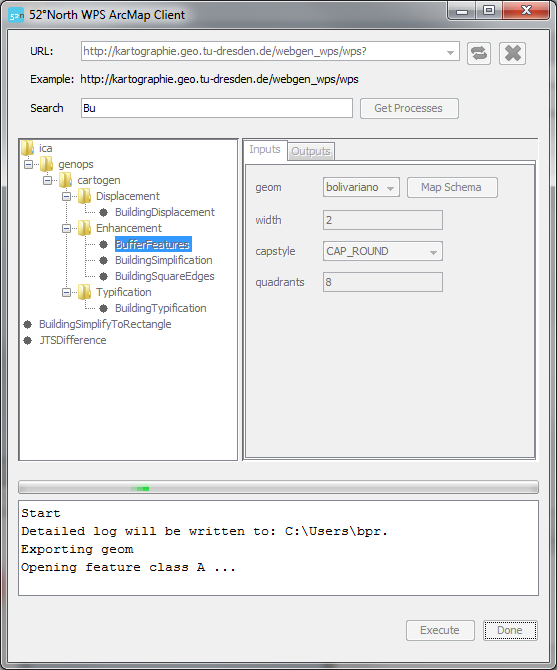 Once the process is finished, the results tab is shown. Vector data can be added to the map, literal (e.g. text) data will be shown in text boxes:
 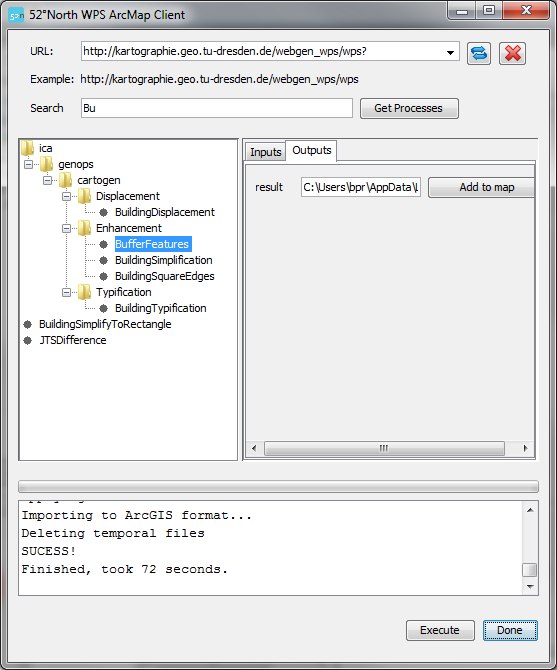 Some processes need vector data sollowing a specific schema as input. The client automatically detects such inputs and activates a button Map Schema next to them:
 A click on this button brings up the schema mapping dialog:
 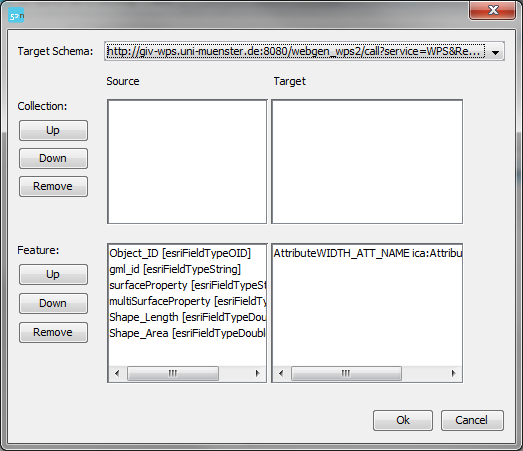 Required attributes from the input schema are shown on the left. Available attributes from the selected layer are shown on the right. You can move the layer attributes up and down to match the semantic and data type of the respective schema attribute:
 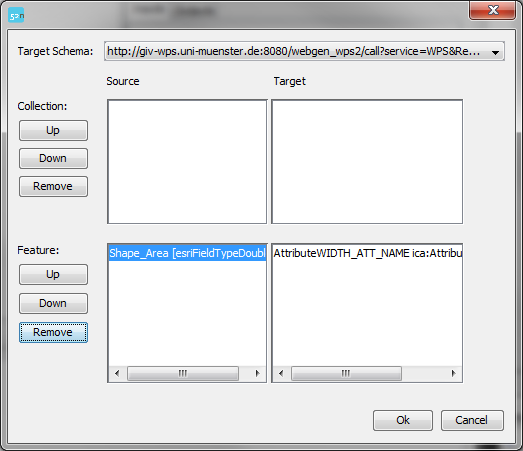 If you are finished, click on Ok and the mapping is stored for the current process execution.
 Edit | Attach | Print version | History: r2 < r1 | Backlinks | View wiki text | Edit wiki text | More topic actions
Topic revision: r1 - 06 May 2013, BenjaminPross
- Toolbox
-
 Users
Users
-
 Index
Index
-
 Search
-
 Changes
-
 Notifications
-
 RSS Feed
-
 Preferences
- Webs
-
 AI_GEOSTATS
- Documentation
- GEONETCAST
- Geoprocessing
- Geostatistics
- Metadata
- Projects
- Sandbox
- Security
- Semantics
- SensorWeb
- System
- V3d
- Categories
Legal Notice | Privacy Statement
 Copyright © by the contributing authors. All material on this collaboration platform is the property of the contributing authors.
Ideas, requests, problems regarding Wiki? Send feedback
Ideas, requests, problems regarding Wiki? Send feedback